How did you get the camera to take photographs?
Ok here is an excellent question -
 how do I actually control the camera.
Basically there are 3 different methods of controlling the camera and 2 methods of choosing when to take photographs.
Methods of controlling the camera:
a) have a servo arm depress the shutter button
b) connect a relay across the switch terminals and have a trigger circuit actuate it
c) connect a trigger circuit directly to the switch terminals
a) is the low tech method and seems to be less reliable as it relies on mechanical contact. BTW I'm an electronic engineer - not a mechanical one - maybe this also guided my decision. This
 method is also the heaviest.
b) This was my old setup. Basically the same as (c) but using a relay instead of directly modifying logic levels on the circuit
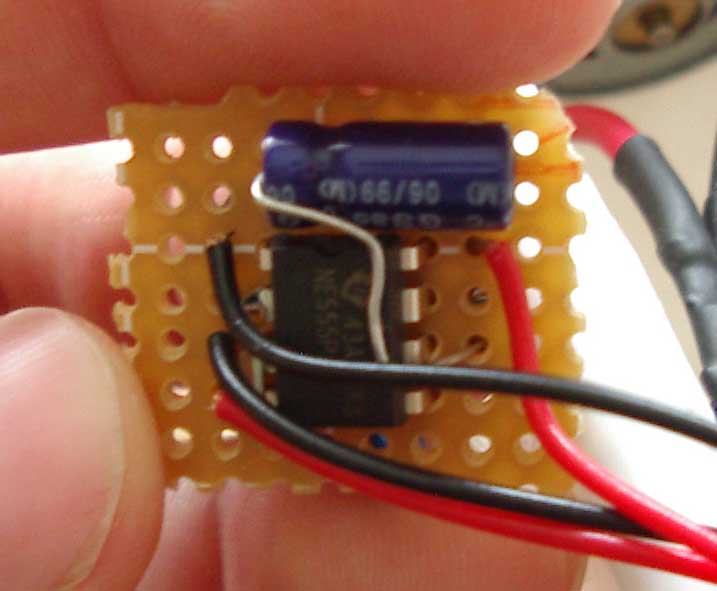
c) My new setup. Took a bit of trial and error to get working (need to connect the output of the trigger circuit up the correct way. This is the lightest solution (shown in pic).
For (b) and (c) the camera needs to be opened up and wires soldered across the switch terminals. Extra care needs to be taken to ensure the internals (lenses and such) of the camera are not damaged in this process. At this stage I also stripped most of the unrequired stuff of the camera off - (cover, ect.).
To actually trigger the camera there are 2 main methods:
a) Using an additional channel on the controller
b) Using a timer circuit.
a) I have a circuit lying around somewhere that should do this - I just couldn't find it. It basically takes the receiver output (which is a PWM setup to drive servos) and coverts it to a logic 1 or 0 depending on the PWM width. This is a better method as the user has complete control of when photos are to be taken.

b) This is the most simple method and one I readily had a circuit available for. I have set the camera up to take a photo every 15s or so. This can be a bit hit and miss as from the ground I'm not sure when photos are actually being snapped. The circuit diagram for this is shown on the right. Connecting a 100nF cap from supply to ground should help to stabilise the input supply voltage).
posted by Robert Ross @ 12:13 PM
![]()

2 Comments:
Shiny. I didn't realise the control signals were PWM. I guess you'll have to dig up that circuit, to implement the manual override. I wonder how the circuit would work?
When I say PWM it is not in the normal definition of PWM. Basically the period stays at 20ms or so. A pulse varies between widths of 1ms and 2ms to control the servo. So still technicallly PWM
Post a Comment
<< Home